Challenge Automation Limits with ULN2803ADW Relay Control

Automation projects need accurate control of many devices. The ULN2803ADW helps by handling relays easily. Its design lets you control many relays without trouble. This ensures the system works well and stays reliable. It also makes circuits simpler while keeping them steady. This blog will show you how to use the ULN2803ADW fully for automation tasks.
Key Takeaways
The ULN2803ADW makes automation projects easier by managing many relays.
It has built-in diodes that stop voltage spikes, keeping circuits safe.
This chip works well with high currents and voltages, perfect for motors.
Pairing the ULN2803ADW with microcontrollers makes designs simpler and easier.
Begin with small projects to learn how to use the ULN2803ADW.
What is the ULN2803ADW?
The ULN2803ADW is a helpful chip for automation projects. It connects small microcontrollers to powerful devices like motors and LEDs. It can control many channels at once, making systems work better. You can use it for home or industrial automation to make designs simpler.
Overview of the ULN2803ADW
The ULN2803ADW has eight channels to boost weak signals. These signals come from microcontrollers and power bigger devices. It’s great for devices needing more power than microcontrollers can give. Its small size fits easily into different projects.
Here’s a look at its pin setup:
Pin Number | What It Does |
|---|---|
1 | Power supply, usually +5V to +50V |
6 | Ground connection |
7-14 | Controls each channel (1-8) |
This chip is popular because it’s simple and reliable. It makes circuits less complicated and keeps them steady.
Key Features and Specifications
The ULN2803ADW has features that make it great for automation. Here are some important details:
Feature | Specification |
|---|---|
Part Number | ULN2803ADW |
Manufacturer | Texas Instruments |
Description | 8 NPN Transistors, 50V, 0.5A |
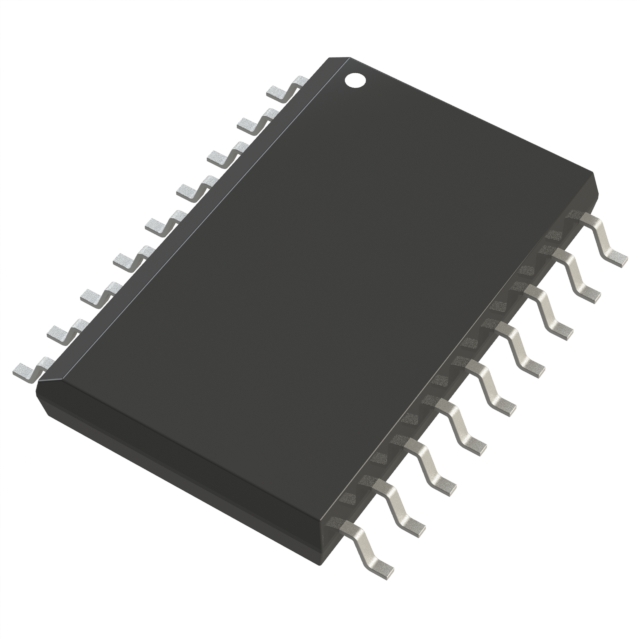
Package | Small 18-SOIC |
Transistor Type | 8 NPN Darlington |
Max Current | 500mA |
Max Voltage | 50V |
Saturation Voltage | 1.6V @ 500µA, 350mA |
Temperature Range | -40°C to 85°C |
Mounting Type | Surface Mount |
One special feature is its flyback diodes. These diodes stop voltage spikes from damaging your circuit. This keeps your parts safe and makes your system last longer.
Applications in Automation
The ULN2803ADW works well in many automation tasks. It handles high currents and voltages to control multiple devices. Common uses include:
Controlling stepper motors
Driving relays
Lighting up LEDs
Running displays
Powering solenoids
For example, in home automation, it can control lights, fans, or alarms. In factories, it can run motors and relays for machines. It’s also useful in robots and IoT projects where precise control is needed.
Adding the ULN2803ADW to your designs makes circuits simpler and better. Its strong features and many uses make it a great tool for automation fans.
Why Use ULN2803ADW for Relay Control?
Handles High Current and Voltage
The ULN2803ADWR can manage high currents and voltages easily. Each channel can handle 500mA and up to 50V. This makes it perfect for controlling motors, solenoids, and relays. It protects your microcontroller from being overloaded. With the ULN2803ADWR, you can safely control many powerful devices. It works well for both home and industrial automation systems.
Built-In Flyback Diodes
The ULN2803ADWR has special built-in flyback diodes. These diodes stop voltage spikes from damaging your circuit. Spikes happen with devices like relays or stepper motors. Without protection, these spikes could harm your system. The table below shows details about these diodes:
Feature | Description |
|---|---|
Built-in Diodes | Stops back EMF, good for inductive loads. |
Common Cathode Clamp Diode | Protects transistors from voltage spikes. |
Maximum Load Voltage | 50 volts |
Maximum Load Current | 500 mA |
Application | Controls relays, solenoids, and stepper motors. |
These diodes make your system safer and last longer. Even in tough conditions, the ULN2803ADWR keeps your automation reliable.
Works with Microcontrollers
The ULN2803ADWR works well with microcontrollers. It boosts weak signals to control strong devices like relays. This makes your circuit simpler and reduces extra parts. Whether for robots or factory systems, it connects microcontrollers to powerful devices. The ULN2803ADWR ensures smooth and easy operation for your projects.
Step-by-Step Guide to Using ULN2803ADW for Relay Control
Required Components
Before starting, gather everything needed for your project. Here’s what you’ll need:
ULN2803ADWR: The main part for controlling relays.
Microcontroller: Examples include Arduino or Raspberry Pi boards.
Relays: Pick ones that match your device’s power needs.
Power Supply: Make sure it provides enough power for your setup.
Connecting Wires: Use these to link all the parts together.
Breadboard or PCB: Helps organize and secure your circuit.
Diodes (if needed): Extra diodes may be useful for certain setups.
Below is a table showing the ULN2803ADWR specifications:
Specification | Details |
|---|---|
Manufacturer | Texas Instruments |
Package | 18-SOIC (0.295", 7.50mm Width) |
Transistor Type | 8 NPN Darlington |
Current - Collector (Ic) (Max) | 500mA |
Voltage - Collector Emitter Breakdown (Max) | 50V |
Vce Saturation (Max) @ Ib, Ic | 1.6V @ 500µA, 350mA |
Operating Temperature | -40°C ~ 85°C (TA) |
Mounting Type | Surface Mount |
Supplier Device Package | 18-SOIC |
Having these items ready makes setting up your relay system easier.
Wiring the ULN2803ADW with Relays
Follow these steps to connect the ULN2803ADWR to relays:
Connect the Power Supply: Attach the positive wire to the VCC pin. Connect the ground wire to the GND pin.
Relay Connections:
Link one side of the relay coil to the output pins (pins 11-18).
Connect the other side of the relay coil to the power supply.
Microcontroller Connections:
Connect the microcontroller’s output pins to the input pins (pins 1-8).
Make sure the microcontroller shares the same ground as the ULN2803ADWR.
Flyback Diodes: Built-in flyback diodes protect against voltage spikes. This is helpful for devices like relays or motors.
Test the Connections: Check all wires to ensure they are secure and correct.
Tip: Start with a breadboard for testing. It’s easier to fix mistakes before moving to a PCB.
Programming the Microcontroller
After wiring, program your microcontroller to control the relays. Below is an example using Arduino:
// Define relay pins
int relay1 = 2; // Connect to ULN2803ADWR input pin 1
int relay2 = 3; // Connect to ULN2803ADWR input pin 2

void setup() {
  // Set relay pins as outputs
  pinMode(relay1, OUTPUT);
  pinMode(relay2, OUTPUT);
}

void loop() {
  // Turn relay 1 ON
  digitalWrite(relay1, HIGH);
  delay(1000); // Wait for 1 second

  // Turn relay 1 OFF
  digitalWrite(relay1, LOW);
  delay(1000); // Wait for 1 second

  // Turn relay 2 ON
  digitalWrite(relay2, HIGH);
  delay(1000); // Wait for 1 second

  // Turn relay 2 OFF
  digitalWrite(relay2, LOW);
  delay(1000); // Wait for 1 second
}
This code turns two relays on and off every second. You can change it to fit your needs.
Note: Make sure the microcontroller’s output voltage matches the ULN2803ADWR input voltage.
By following these steps, you can set up and program your relay system successfully.
Testing and Troubleshooting
After wiring and programming your ULN2803ADWR, testing makes sure it works. Follow these steps to check your circuit and fix problems.
Step 1: Turn On the Power
Switch on the power supply and see if the system starts. Use a multimeter to check voltage at the ULN2803ADWR’s VCC and GND pins. The voltage should match your design. If it doesn’t start, check for loose wires or wrong connections.
Step 2: Check Input Signals
Send signals from your microcontroller to the ULN2803ADWR input pins. Use a multimeter or oscilloscope to confirm signals reach the chip. If signals are missing, check the microcontroller’s code and pin setup.
Step 3: Test Relay Activation
When signals reach the ULN2803ADWR, the relay should activate. Listen for a click or use a multimeter to check voltage across the relay coil. If the relay doesn’t work, check the wiring between the chip and relay.
Tip: Make sure the relay matches the ULN2803ADWR’s output specs.
Step 4: Inspect Flyback Diodes
The ULN2803ADWR has flyback diodes to stop voltage spikes. If parts act strange or break, the diodes might not work. Look for overheating or damage in the circuit.
Step 5: Test Connected Devices
Attach devices like motors or LEDs to the relays. Turn on the relays using the microcontroller and watch the devices. If they don’t work, check the relay-to-device connections. Ensure devices fit the ULN2803ADWR’s limits.
Fixing Common Problems
Problem: Circuit won’t start.
Solution: Check power connections and match voltage to the ULN2803ADWR.Problem: Relay doesn’t work.
Solution: Confirm microcontroller signals reach the ULN2803ADWR. Check relay wiring.Problem: Device doesn’t run.
Solution: Test relay switching and check the device separately.Problem: Parts overheat or break.
Solution: Ensure devices stay within the ULN2803ADWR’s current and voltage limits.
Note: Test your circuit on a breadboard first. It’s easier to fix mistakes before using a PCB.
By testing step-by-step, you can find and fix problems fast. Careful checks help your ULN2803ADWR system work smoothly.
Practical Uses of ULN2803ADW in Automation
Home Automation Systems
The ULN2803ADW is important for smart home systems. It can control things like lights, fans, and alarms. Its ability to handle strong currents and voltages makes it great for managing many devices at once. For example, you can connect it to relays to turn appliances on or off using a microcontroller. This setup makes your circuit simpler and works reliably.
Tip: Use the ULN2803ADW for smart lighting. It helps automate schedules or lets you control lights with a phone app.
Adding the ULN2803ADW to your home system saves energy and makes life easier.
Industrial Automation
In factories, the ULN2803ADW powers heavy machines. It can control motors, solenoids, and other strong devices used in production. Its built-in flyback diodes stop voltage spikes, keeping your circuit safe in tough conditions.
You can also use it to manage relays in conveyor belts or assembly lines. This makes your design less complicated while keeping control precise. The ULN2803ADW is strong and dependable for factory tasks.
Note: Always check that connected devices match the ULN2803ADW’s current and voltage limits.
Robotics and IoT Projects
The ULN2803ADW is great for robots and IoT projects. It connects low-power microcontrollers to strong motors or sensors. You can use it to run motors, control relays, or light up LEDs in robots.
For IoT, the ULN2803ADW helps smart devices work together. For example, it can automate doors, blinds, or monitor the environment. Its small size and flexibility make it perfect for tight spaces.
Using the ULN2803ADW, you can easily build efficient robots and IoT systems.
The ULN2803ADW is an easy and dependable way to manage relays in automation projects. It handles high currents, has built-in flyback diodes, and works well with microcontrollers. This makes it useful for both beginners and experienced users. Using this chip can make your circuits simpler and work better.
Tip: Begin with small projects to try out the ULN2803ADW. Whether you’re automating your home or creating a robot, this chip can help you succeed.
Always check your wiring and code carefully. A proper setup ensures the ULN2803ADW works at its best.
FAQ
Why is the ULN2803ADW good for relay control?
It has eight transistor drivers that handle high currents well. You can connect many relays without overloading your microcontroller. The built-in diodes stop voltage spikes, keeping your circuit safe and reliable.
Can the ULN2803ADW work with any microcontroller?
Yes, it works with most microcontrollers. It boosts weak signals to control devices needing more power. Just make sure the microcontroller’s output matches the ULN2803ADW’s input voltage.
How do the built-in diodes protect the circuit?
The diodes stop voltage spikes from devices like motors or relays. These spikes can harm your parts. The ULN2803ADW’s diodes keep your circuit safe and long-lasting.
What is the highest current the ULN2803ADW can handle?
Each channel can handle up to 500mA of current. This makes it great for running motors, relays, and solenoids. Always check your device’s current needs to stay within safe limits.
Are there other options besides the ULN2803ADW for relays?
Yes, there are other transistor arrays. But the ULN2803ADW is popular for its safety and strong features. It handles high power well, making it a top choice for automation projects.
See Also
Explore ADM2682EBRIZ for Effective Remote Management Solutions
Utilize ACS712ELCTR-05B-T Chip for Enhanced Motor Management
Always Consider SN65HVD3082EDR When Designing Robots
Understanding MCIMX6Q6AVT10AD's Role in Industrial Control Innovation

© Copyright 205 Zhongdeyuan (Hong Kong) Technology Co., Limited - All Rights Reserved.